PVE8.1安装配置记录

基于debian12安装pve8.1
参考https://pve.proxmox.com/wiki/Install_Proxmox_VE_on_Debian_Buster
这个配置是基于debian10也就是buster,12的话要修改为bookworm。
- 配置sources.list的部分,如果在国内最好更换一下源:
echo "deb [arch=amd64] http://download.proxmox.com/debian/pve buster pve-no-subscription" > /etc/apt/sources.list.d/pve-install-repo.list
改为:
echo "deb [arch=amd64] https://mirrors.ustc.edu.cn/proxmox/debian/pve bookworm pve-no-subscription" > /etc/apt/sources.list.d/pve-install-repo.list
gpg版本改为:
wget http://download.proxmox.com/debian/proxmox-release-bookworm.gpg -O /etc/apt/trusted.gpg.d/proxmox-release-bookworm.gpg
清理内核建议使用
pvekclean:https://github.com/jordanhillis/pvekclean配置网口桥接
参考https://pve.proxmox.com/wiki/Network_Configuration#_default_configuration_using_a_bridge
比如:
cat /etc/network/interfaces

# This is an autoconfigured IPv6 interface

iface enp2s0 inet6 auto

auto vmbr0
iface vmbr0 inet static
        address 192.168.2.91/24
        gateway 192.168.2.1
        bridge-ports enp2s0
        bridge-stp off
        bridge-fd 0
简单说就是可以和pve处在同一个网段,但是要网关支持单网口多MAC,不支持的话要用NAT模式,让pve宿主做网关,通过iptables配置netfilter转发数据。
安装tiny win11
准备工作
生成精简镜像:https://github.com/bravomail/tinier11
下载驱动ISO:https://github.com/virtio-win/virtio-win-pkg-scripts
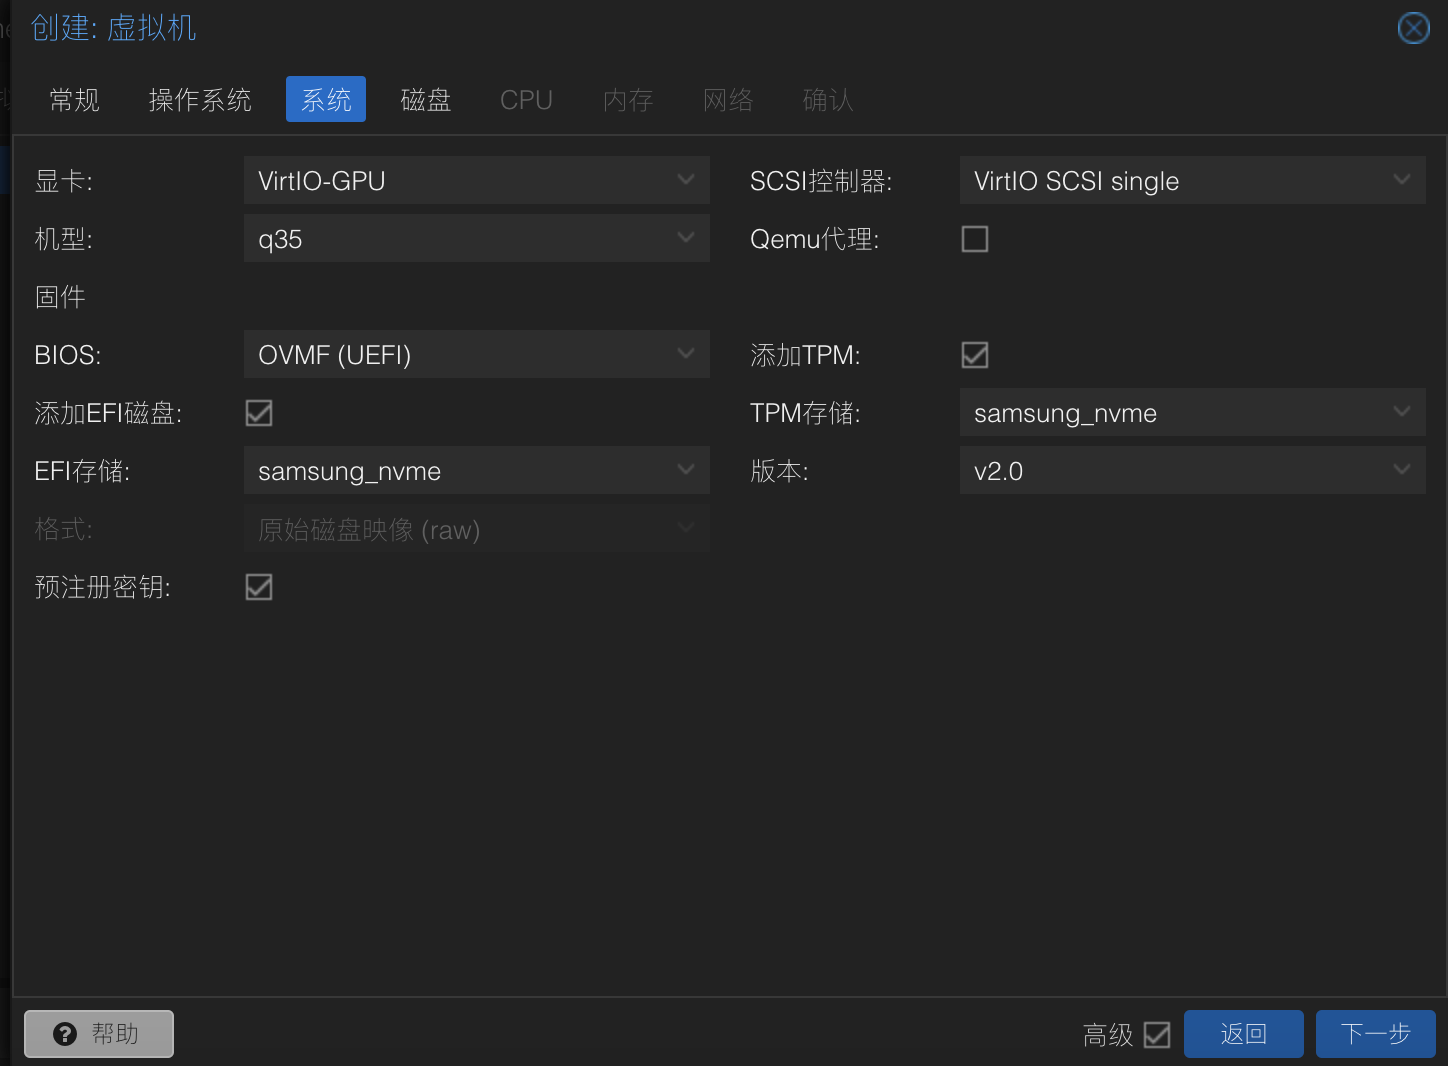
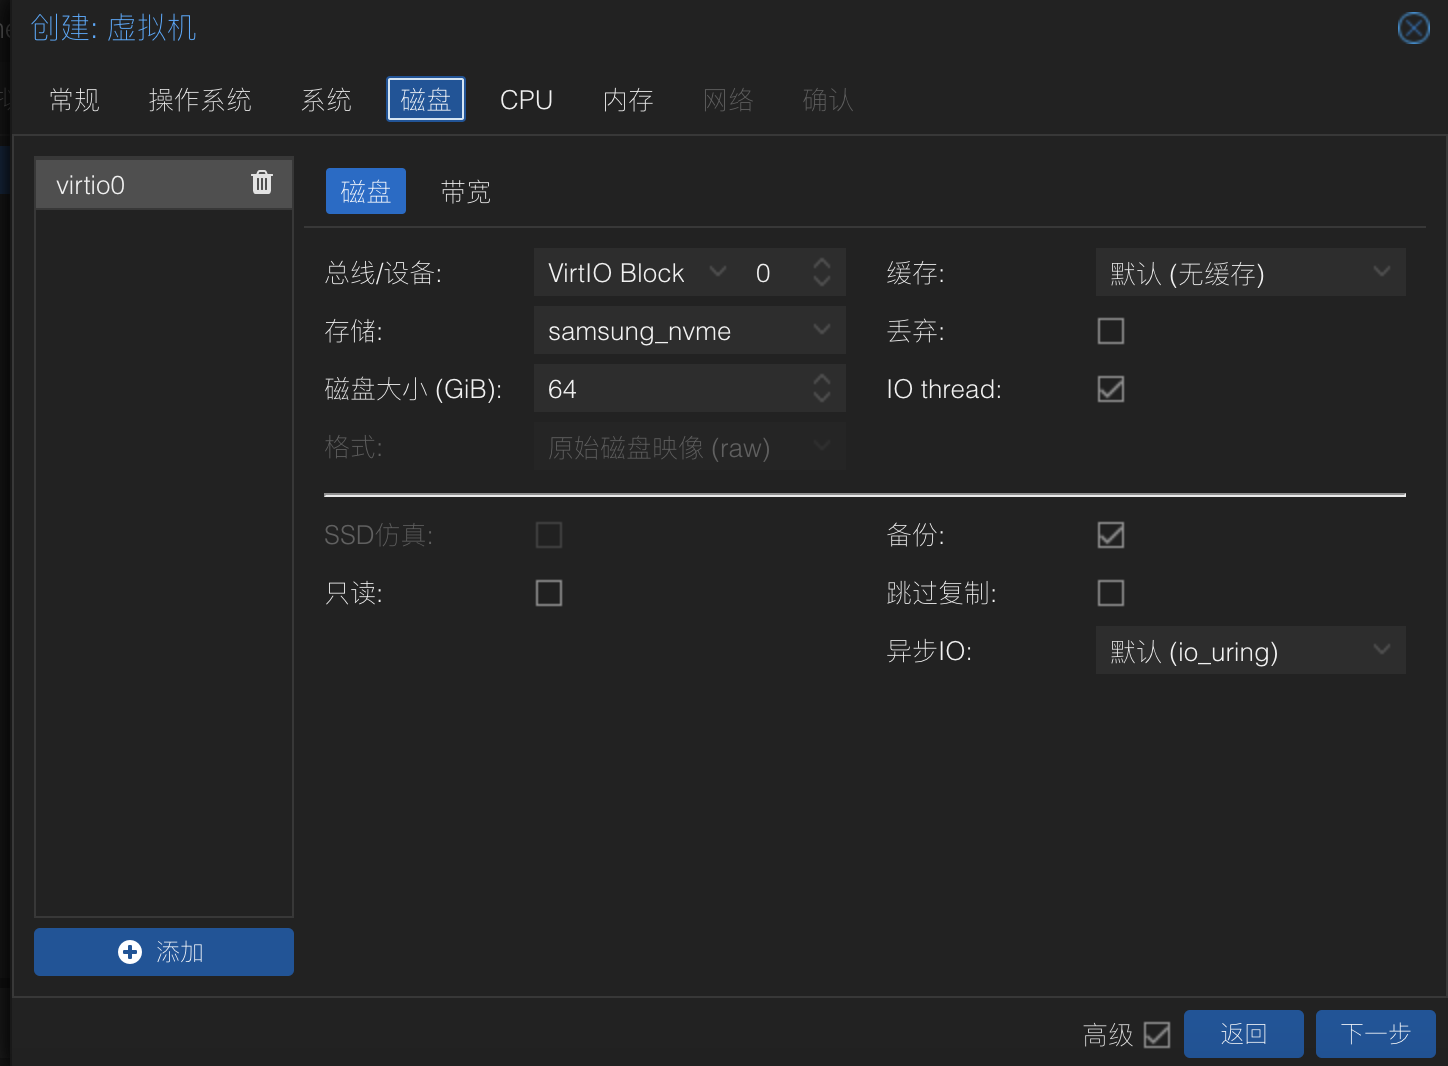
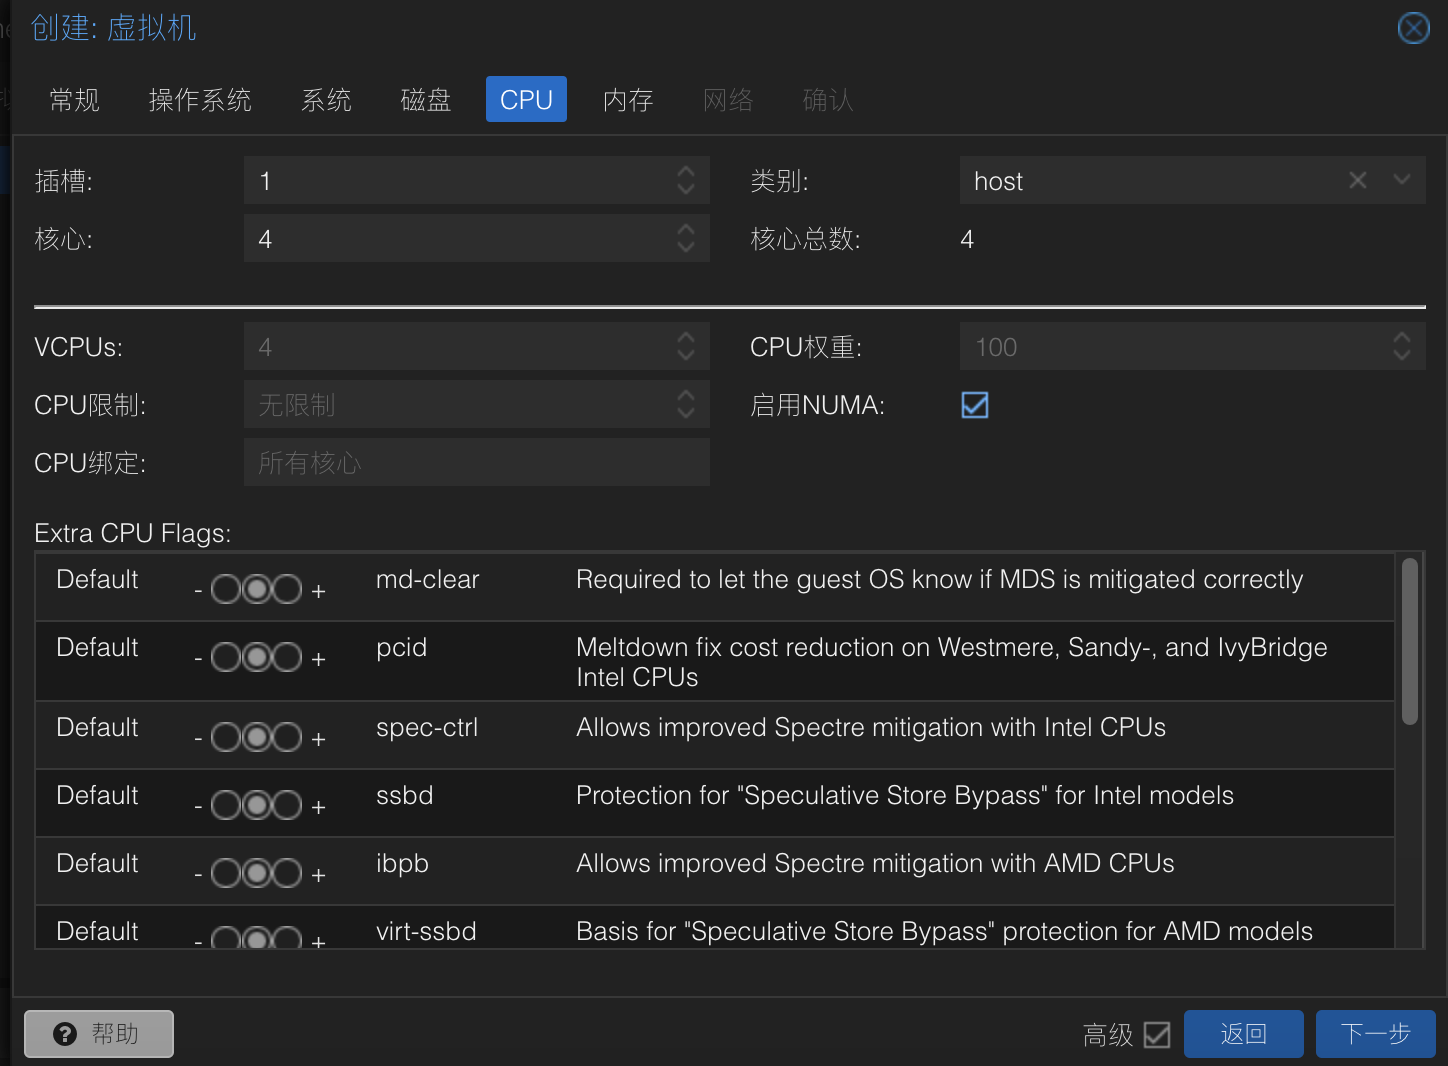
VM配置
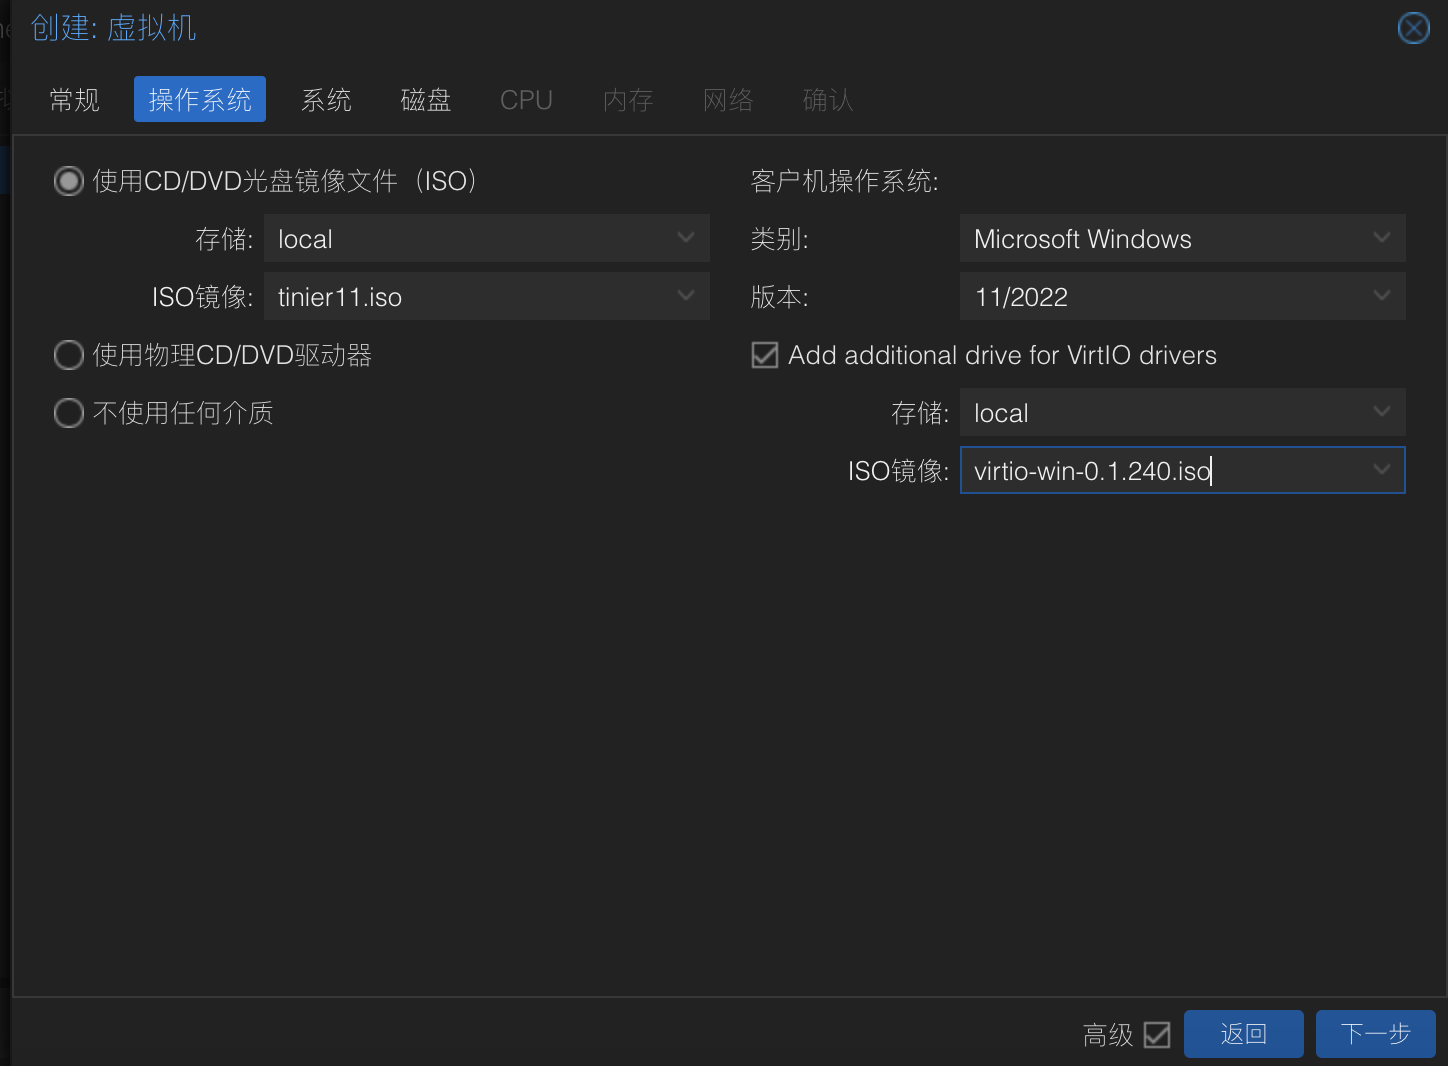
系统安装
基本和物理机安装没区别。
开机安装,安装到选择磁盘的时候选择加载驱动,然后找到virtio那个盘,选{架构}目录下对应的系统版本目录,比如:amd64/win11。
最后启动进入系统后,执行virtio盘中的可执行文件,打上其他驱动。
其他
如果通过远程桌面登录过,那么pve的acpi关机指令不会生效,需要通过QEMU guest agent来完成关机。
安装:
执行virtio盘中的guest-agent目录对应安装程序。
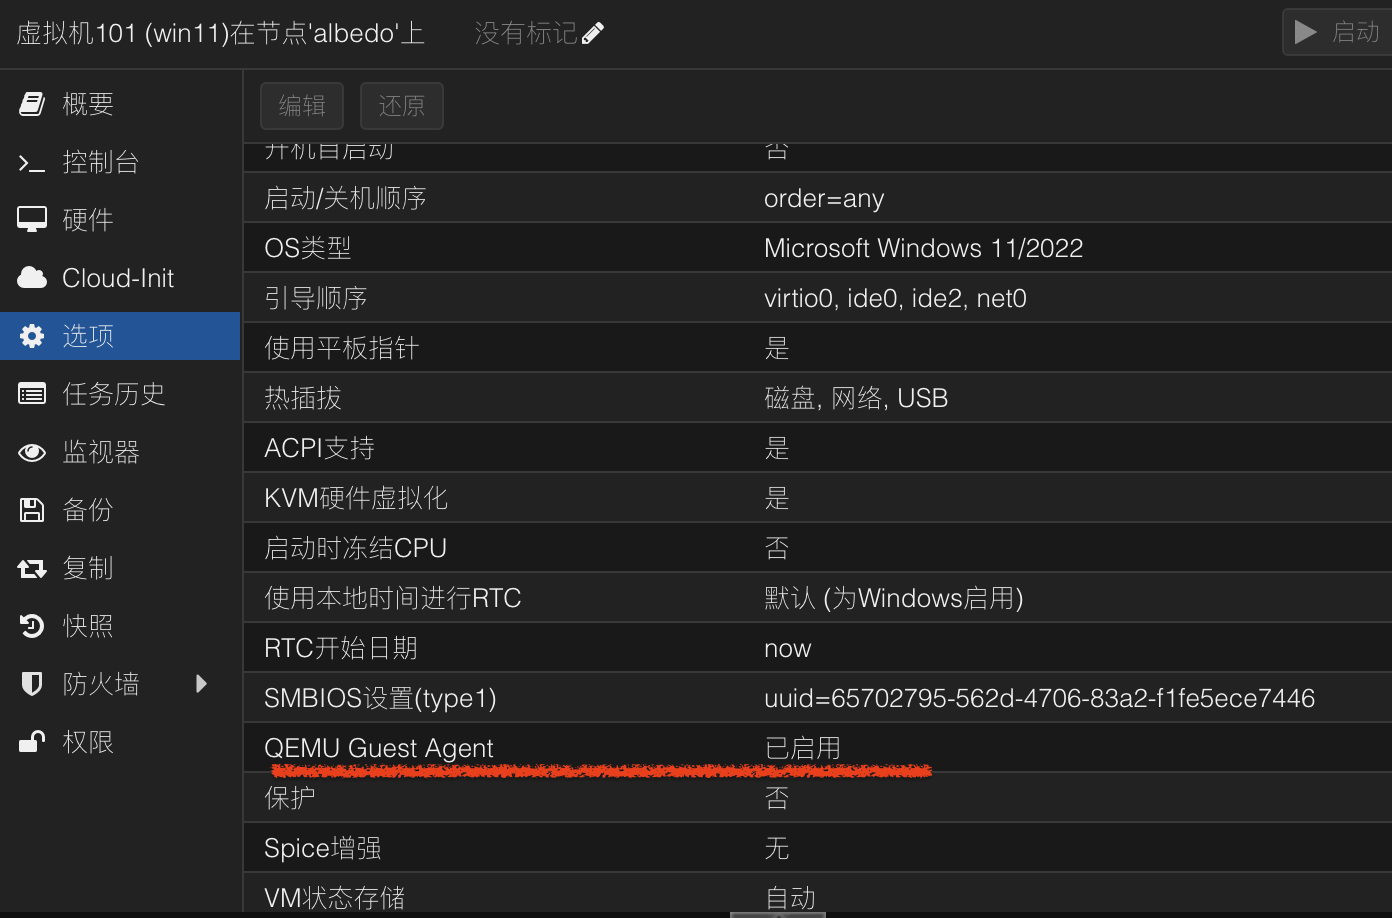
VM设置guest agent启用:
配置debian/ubuntu
Serial Terminal
宿主机执行:
# 101是vm的序号
qm set 101 -serial0 socket
接下来参考:Serial Terminal - Configuration on the guest
硬件直通
硬盘
备忘:
ls -la /dev/disk/by-id/|grep -v dm|grep -v lvm|grep -v part
qm set <vmid> --scsiX /dev/disk/by-id/xxxxxxx
qm set <vmid> --delete scsiX
硬盘控制器
备忘:
ls -la /sys/dev/block/|grep -v loop |grep -v dm
[参考]
- https://pve.proxmox.com/wiki/Install_Proxmox_VE_on_Debian_Buster
- https://github.com/jordanhillis/pvekclean
- https://pve.proxmox.com/wiki/Network_Configuration#_default_configuration_using_a_bridge
- https://github.com/bravomail/tinier11
- https://github.com/virtio-win/virtio-win-pkg-scripts
- https://pve.proxmox.com/wiki/Serial_Terminal